
Modify with Instructions: User Guide
Luma AI’s Modify with Instructions unlocks powerful new ways to transform your videos with precision and creativity. This guide walks through practical workflows to help you get started, and to inspire your own experimentation.
Currently available to all subscribers.
Modify video with a new Start Frame
Edit the style, subject, or specific elements of your video by editing or replacing the original Start Frame, and then using it as the new driving visual to transform your original input video into something new
You can now edit your Start Frame natively without ever leaving Dream Machine, or make changes with other image editing tools and then upload it back into your composer window.
To do this, select ‘Modify’ in the settings panel, and then drag and drop or upload the video you want to modify (currently up to 100MB and 10 seconds max, in .mov and .mp4 format) into the composer window.

At this point you can modify your Start Frame by selecting ‘Modify Frame’, and typing simple instructions describing the transformation you want to see in your output. Once you’re happy with the modified Start Frame results you can 'Apply' to transport the edited Start Frame back into the composer window where you can submit to create your modified video.
TIP: Save your modified Start Frame prompts externally, they’re not currently stored in Dream Machine.
———————————————
Modify video with instructions only
You can also modify your video with simple written instructions only.
There are no complicated rules here, simple instructions work best. The most effective ones usually have three parts:
A transformative verb (like add, remove, change, replace, etc.)
A clear description of the subject(s) you want to transform
A clear description of how you want it transformed
Put them together, and you get a prompt that reads something like: 'Change the spheres to different color eyeballs', or 'change the spheres to baseballs'
Start with this basic structure, then tweak, refine, and go deeper. Additionally, you can modify your Start Frame and add simple, clear instructions to reinforce the scene transformation
TIP: If the video changes things you wanted to keep, try adding phrases like “keep the lighting unchanged” or “use the same background” to help preserve the parts you like.
———————————————
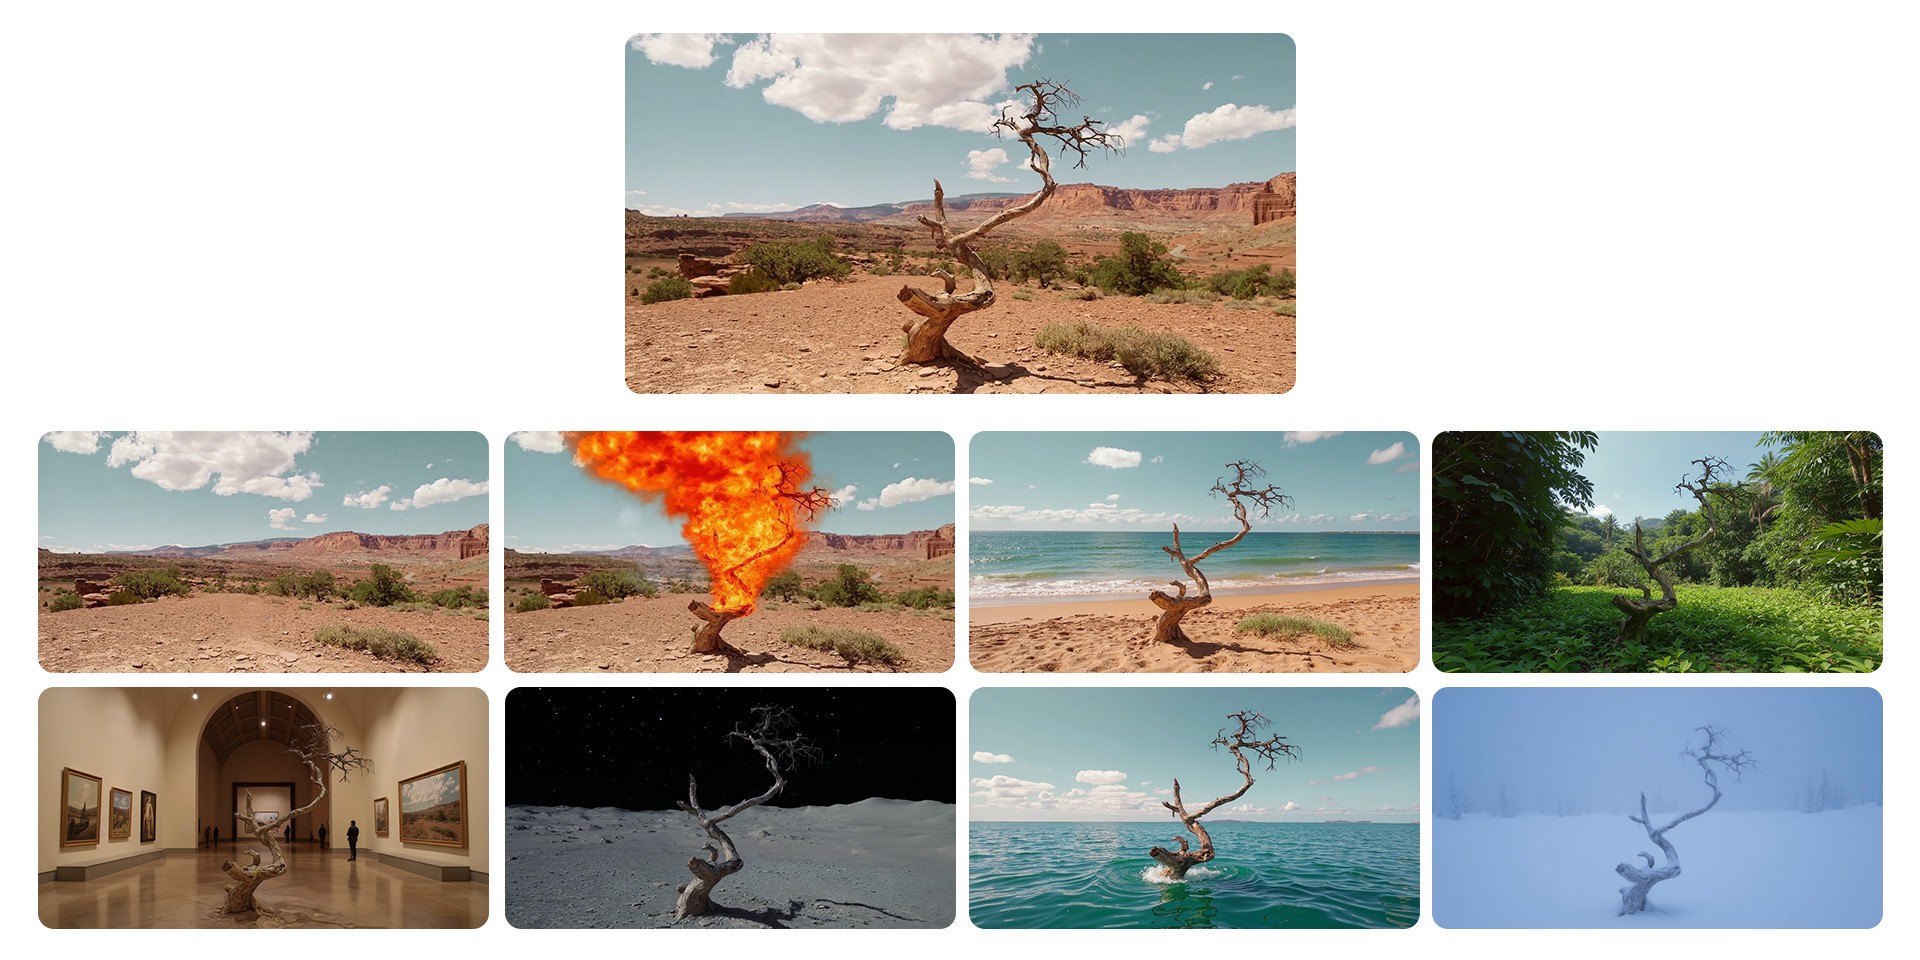
Modify Strength Levels
The key to great results is choosing the right Modify Video Strength Level for your vision.
Adhere
Your output closely matches the original video. Perfect for subtle changes like adjusting lighting, adding light textures, or applying gentle style filters. Think of it as enhancing what's already there rather than replacing it.
Flex
Balances creativity with recognition. You can make significant style changes while keeping the core elements identifiable. This sweet spot works well for most transformations where you want noticeable change but not complete reinvention.
Reimagine
Gives you maximum creative freedom. Great for dramatic transformations and reinterpreting entire scenes or characters like turning people into creatures, completely changing environments, or creating surreal scenarios.
This is just the beginning. You can combine these techniques and prompts to push your creative vision even further.